Table of Contents
Homeowners Guide to Removing Garbage Disposal
Understanding how to remove a garbage disposal is essential, especially during kitchen renovations or when facing malfunctions. This skill ensures a functional kitchen and upholds safety standards.
Whether upgrading an old disposal for aesthetics, replacing an outdated model, or fixing issues like clogs or leaks, this guide will equip you with the necessary steps to confidently and safely remove all the pieces of your garbage disposal.
Materials Needed
To remove a garbage disposal, you’ll need access to the following tools and materials:
- Adjustable Pliers or Wrench: For loosening and tightening connections.
- Screwdriver: To remove the electrical cover plate and mounting ring screws.
- Bucket or Towels: To catch any water that may spill during removal.
- Non-Contact Voltage Tester: To ensure the power supply is disconnected.
- Putty Knife: For scraping off old plumber’s putty or sealant.
- Mild Cleaning Agent: To clean the sink flange, use dish soap or a mixture of baking soda and vinegar.
- Rubber Mallet or Piece of Wood (Optional): To gently tap the sink flange if it’s stuck.
Safety Measures
Before starting the removal of your garbage disposal, take these essential safety and preparation steps:
- Power Safety: Turn off the power at the circuit breaker or unplug the disposal unit to avoid electrical hazards.
- Water Control: Shut off the sink’s water supply to prevent leaks.
- Tool Gathering: Have a pipe wrench, screwdriver, bucket, and flashlight ready.
- Workspace Clearance: Clear the area under the sink to ensure a comfortable working space.
- Protective Gear: Wear gloves and safety goggles to safeguard against potential spills and sharp edges.
- Tool Inspection: Check that all tools are in proper working order and appropriate for the task.
With these measures in place, you can safely remove the garbage disposal.
Step-by-Step Instructions on How To Remove a Garbage Disposal

Step 1: Disconnect the Power Supply
First, locate your home’s circuit breaker or fuse box to disconnect the power supply to the garbage disposal safely. Identify the breaker or fuse that controls the power to the garbage disposal, which is typically labeled. Switch off the breaker or remove the fuse to cut off the electrical supply.
Use a non contact voltage tester or multimeter to confirm that the power is off for added safety. Unplugging the disposal unit from the outlet under the sink is also advisable if it’s plugged in. Ensure your hands are dry and standing on a dry surface while performing these steps. Double-check the power is off before proceeding with the removal process.
Step 2: Remove the Drain Lines
Place a bucket or towel under the sink to remove the drain lines from the garbage disposal to catch residual water. Use adjustable pliers or a wrench to loosen the clamp that secures the dishwasher drain hose, if applicable, and gently detach it.
Next, use a pipe wrench or channel-lock pliers to loosen the slip nut connecting the garbage disposal to the drain pipe. Carefully wiggle the pipe free, ensuring any trapped water drains into your bucket. It’s important to keep a firm grip on the pipe to prevent spills and to protect the sink’s trap, which may be reused.
Step 3: Remove the Dishwasher Drain Hose
First, to remove the dishwasher drain hose, locate the hose connection to the garbage disposal unit or the sink drain. Place a bucket or towel underneath the connection point to catch any residual water. Use a pair of pliers or a screwdriver to loosen the clamp or screw that secures the hose to the disposal or drain.
Once the clamp is loosened, gently wiggle and pull the hose off the connection. If the hose is stuck, gently twist it back and forth to loosen it. Be sure to keep the hose upright to prevent water inside from spilling out.
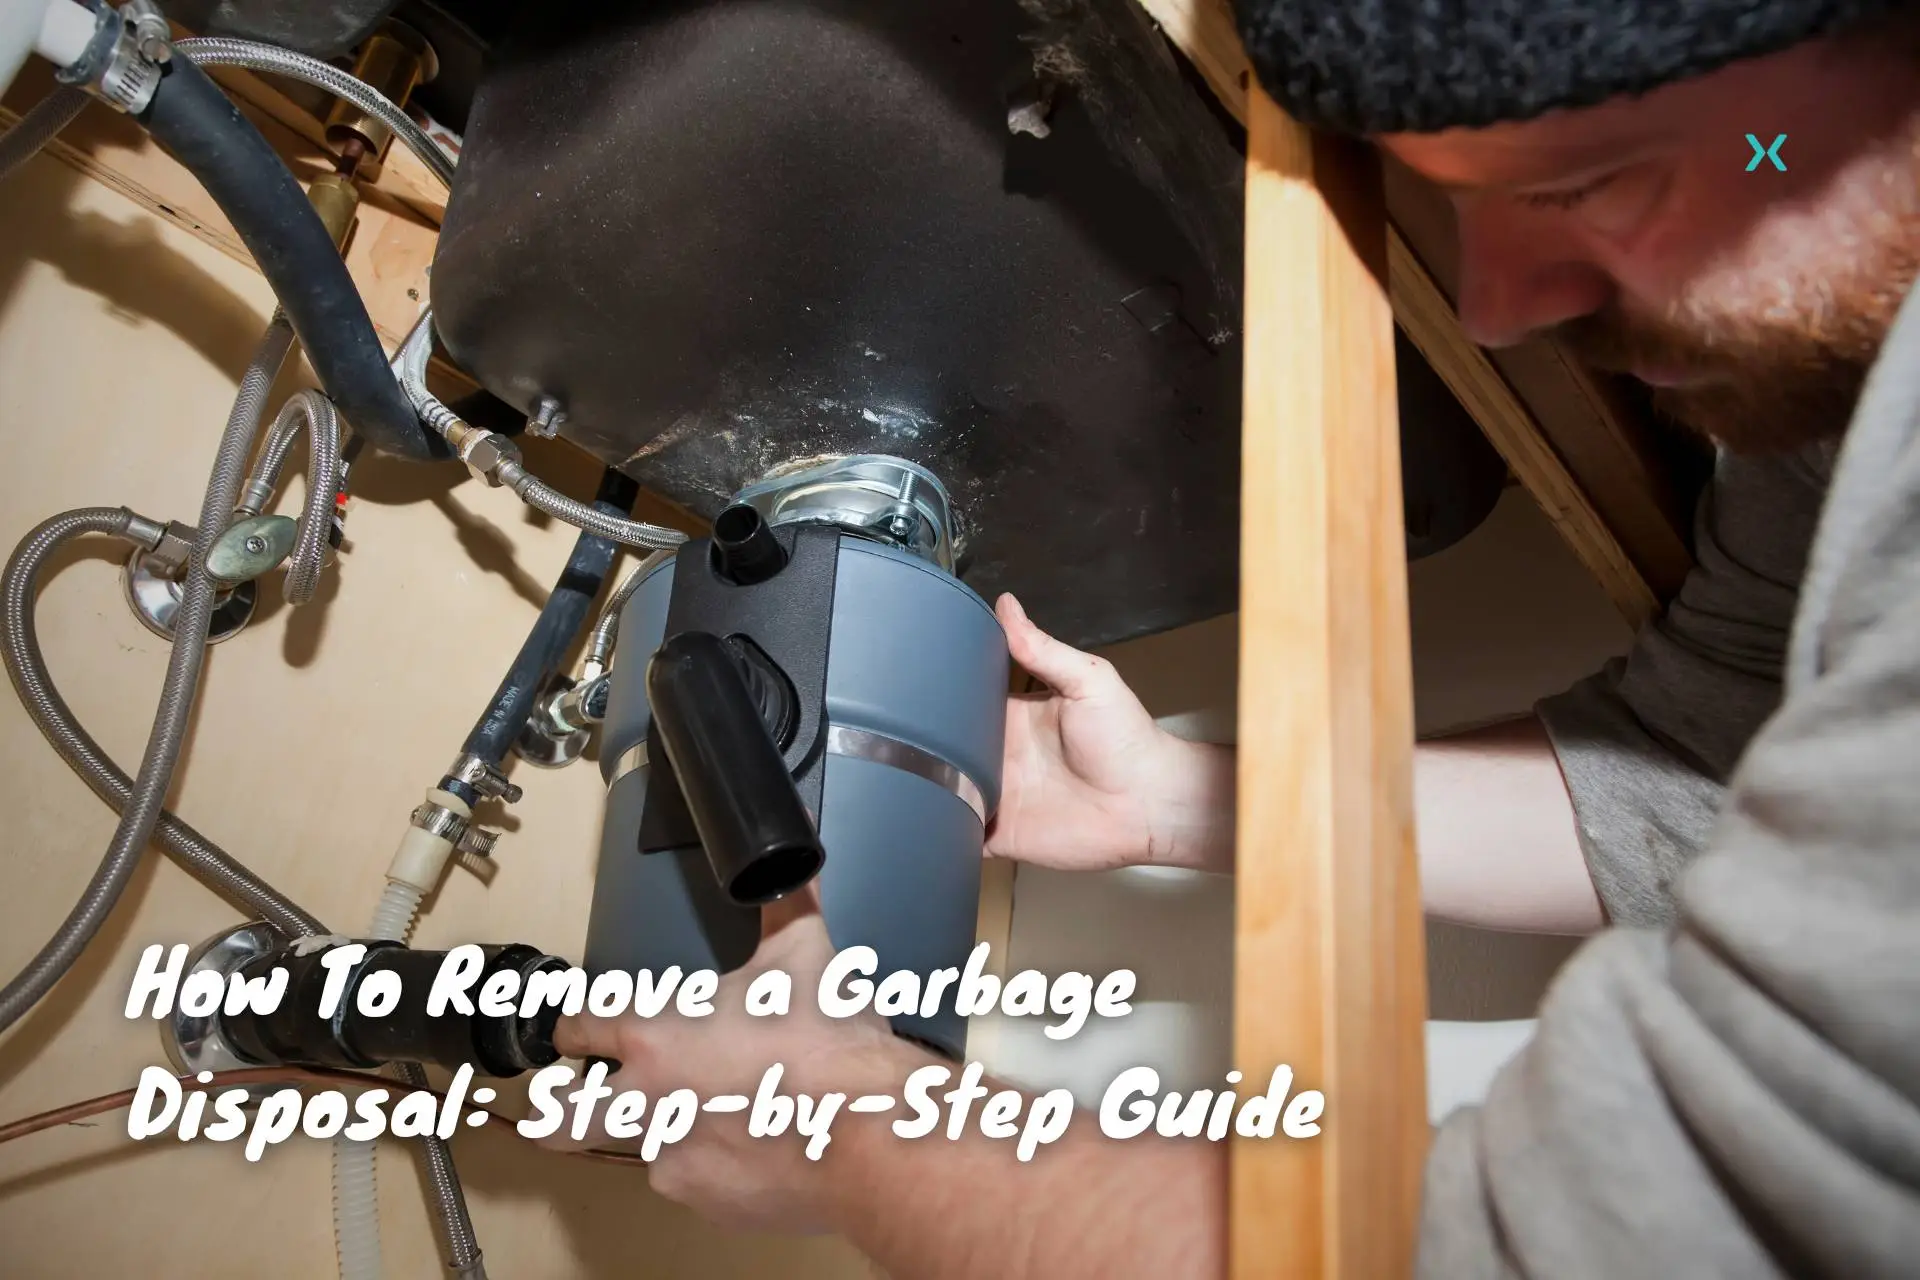
Step 4: Detach the Garbage Disposal Unit
To detach the garbage disposal unit, start by supporting its weight with one hand or placing a sturdy object underneath it, such as a paint can. Use a screwdriver or a special wrench (often provided with the disposal) to turn the mounting ring counterclockwise with your free hand.
As the ring loosens, the disposal unit will detach from the sink mount. Carefully lower the unit onto the support or into your hand, ensuring you maintain a good grip to prevent dropping it. Some models may have a quick-release mechanism, so check for a lever or button that simplifies this process.
Step 5: Remove the Mounting Assembly
To remove the mounting assembly, start by loosening the screws on the mounting ring using a screwdriver. Once the screws are loosened, you can remove the ring by sliding it up and off the sink flange. Next, push the sink flange up through the sink opening and remove it from above.
If the flange is stuck, gently tap it with a rubber mallet or a piece of wood to loosen it. Be careful not to scratch the sink surface. Once the flange is removed, clean any old plumber’s putty or sealant from the sink surface to prepare it for a new installation or to restore the original sink appearance.
Step 6: Remove Wires From the Disposal
Before removing wires from the disposal, ensure the power supply is disconnected. Locate the electrical cover plate on the disposal unit, usually found at the bottom. Unscrew the plate with a screwdriver to expose the wire connections inside. You’ll see a black (hot), white (neutral), and green (ground) wire.
Loosen the wire nuts or screws that secure each wire together. Disconnect the wires by gently pulling them apart. For the ground wire, it may be attached to a green screw on the disposal’s body—unscrew this as well. Organize the wires safely out of the way and replace the electrical cover plate on the disposal unit if necessary.
Step 7: Clean the Sink Flange
After removing the garbage disposal and sink flange, clean the sink flange area to remove any residue or buildup. Start by scraping off any old plumber’s putty or sealant with a putty knife, being careful not to scratch the sink surface. Next, clean the area with a mild cleaning agent, such as dish soap or a mixture of baking soda and vinegar.
Apply the cleaner with a soft cloth or sponge and scrub gently to remove any remaining debris. Rinse thoroughly with water and dry with a clean cloth. A non-abrasive cleaner or a paste of baking soda and water can be used for stubborn stains. Avoid harsh chemicals or abrasive materials that could damage the sink or flange.
Additional Tips and Tricks

Here are some additional tips and tricks for garbage disposal removal that can save you time and effort:
- Reuse the Discharge Tube: If it is in good condition, consider reusing it with the new disposal unit. This can save time and money as long as the fit is compatible and there are no signs of wear or damage.
- Choose the Right Sealant: When reinstalling or replacing parts, using the right sealant is crucial for preventing leaks. Plumbers’ putty or silicone sealant are common choices, but always check the manufacturer’s recommendations for the best results.
- Check the Flange: The sink flange, which connects the disposal to the sink, should be inspected for wear or damage. If it’s compromised, replacing it can prevent future leaks and ensure a secure fit.
- Use a Camera for Hard-to-See Areas: If you’re having trouble accessing or viewing certain parts of the disposal, use the camera on your smartphone to get a better view. This can help you identify issues or confirm proper alignment without contorting yourself under the sink.
- Test Before Final Tightening: Before fully tightening all connections, do a test fit and alignment check. This can prevent the need for adjustments later on and ensure everything is correctly aligned from the start.
Troubleshooting Common Issues
During garbage disposal removal, you might face issues like leaks or jams. Here are the solutions:
- Leaks: Inspect connections and seals for wear or damage. Tighten loose fittings and replace old gaskets or seals. Use plumbers’ putty or silicone for a watertight seal.
- Jams: Disconnect the power first. Use an Allen wrench to manually turn the motor shaft from the bottom. If accessible, use tongs or pliers to remove the top obstruction.
- Stuck Mounting Ring: Apply penetrating oil to loosen the ring. If resistant, gently tap it with a rubber mallet.
- Electrical Issues: Check the circuit breaker and GFCI reset button. Inspect its internal wiring or switch if the disposal doesn’t power on.
- Rusty Components: Apply rust penetrant to corroded screws or bolts. Let it soak before removal.
Conclusion

In conclusion, removing garbage disposals involves careful attention to safety, proper disconnection of electrical and plumbing components, and precise execution. Prioritize safety, use the right tools, and follow each step meticulously. If you encounter challenges, seek professional help or ask questions from your local plumber for a successful removal process.
Phyxter Home Services offers expert advice and quality information on home maintenance. Explore our plumbing articles and services to support your home needs, and see if Phyxter services your area for professional solutions.
